How to Build a Backyard Pickleball Court on a Budget
Share
Imagine sipping iced tea on your patio while your very own pickleball court waits just steps away. Sounds like a luxury, right? Think again! Creating a backyard pickleball court doesn't have to drain your bank account—it just takes a dash of creativity, a pinch of elbow grease, and a good ol’ DIY spirit.
Whether you’re dreaming of casual rallies with friends or honing your dink game under the stars, this guide will walk you through how to construct a functional, fun, and affordable backyard pickleball court—without requiring a celebrity-sized estate or deep-pocket budget.
Let’s turn your turf into a court worth rallying on.
Step 1: Pick Your Playground — Choosing the Right Space
Before you start marking lines, you’ll need to find your canvas.
🟩 Ideal Dimensions:
- Official Court Size: 20 feet wide x 44 feet long
- Minimum Recommended Space: 30 feet x 60 feet (for safety zones and foot clearance)
Don’t have that much room? No problem! Many backyard setups shrink things slightly for recreational play. Focus on flat, open areas like:
- Driveways
- Patios
- Side yards
- Concrete pads
- Grass or turf spaces
🏡 Pro Tip: South-facing areas get the best lighting throughout the day and minimize blinding sun during peak play hours.
Step 2: Pick the Right Surface (Budget-Conscious Options Included)
Surface selection can make or break your bounce—literally. While premium courts use acrylic-coated concrete, we’re sticking to budget-friendly alternatives.
💰 Affordable Surface Options:
|
Surface Type |
Pros |
Cons |
|
Asphalt Driveway |
Already flat, durable |
Can be hard on joints |
|
Concrete Patio |
Great bounce, permanent |
More expensive to install |
|
Artificial Turf |
Easy on knees, aesthetic appeal |
Requires level base and maintenance |
|
Packed Gravel + Mat |
Inexpensive, flexible layout |
Reduced bounce quality |
|
Interlocking Court Tiles |
DIY-friendly, modular |
Medium cost upfront |
🎨 Pro Tip: You can also use outdoor sports tiles on top of concrete for a semi-permanent, low-maintenance option that mimics pro surfaces.
Step 3: Mark Your Territory — DIY Court Lines
Court lines are where things start to look official, and good news—you don’t need a professional crew to make it happen.
🖌 Budget Line Marking Options:
- Chalk Line or Carpenter’s Chalk – Ideal for temporary layouts
- Painter’s Tape – Great for short-term setups and visualizing placement
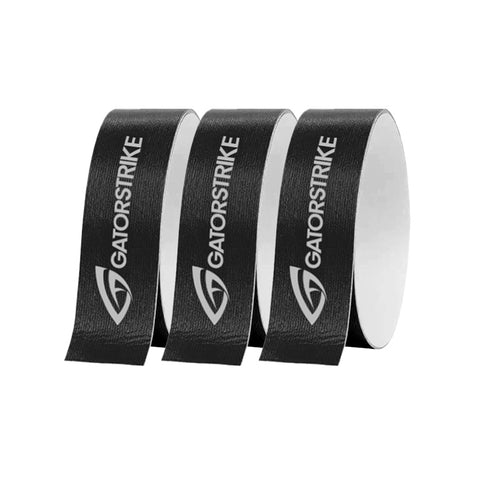
- Outdoor Court Tape – Weather-resistant, more durable
- Paint + Stencils – Permanent, best for dedicated courts
Use a measuring tape, string line, and chalk or tape to outline:
- Baseline and Sidelines
- Non-Volley Zone (NVZ, a.k.a. "the Kitchen")
- Centerline and Service Areas
📏 Quick Fix: Pickleball line kits are available online and include pre-sized templates to take the guesswork out.
Step 4: Get Net-Working — Affordable Net Solutions
The net is the heart of the court. A good one doesn’t need to cost a fortune.
🥅 Budget Net Options:
- Portable Pickleball Nets (~$75–$150): Lightweight, easy to assemble, and perfect for temporary setups.
- DIY Net Systems: Use PVC pipe, garden stakes, or metal conduit + mesh netting or rope.
- Repurposed Tennis Nets: If you already have a net post setup, just lower the height to 34 inches at center.
⚙️ Techie Tip: Some portable nets even have built-in wheels, so you can roll them away post-play and preserve your lawn.
Step 5: Light It Up (Optional but Awesome)
Want to rally into the twilight hours? Outdoor lighting adds a magical touch—and boosts safety.
💡 Budget Lighting Hacks:
- Solar-powered flood lights
- String lights + outdoor extension cords
- Clamp work lights on poles or fences
🌟 Pro Tip: Even a couple of motion-sensor flood lights can create a dramatic night court effect for less than $50.
Step 6: Add Personality — Courtside Comforts on a Dime
Make your backyard court feel like a retreat—not just a rectangle.
✅ Budget-Friendly Add-Ons:
- Folding benches or lawn chairs for spectating
- DIY paddle holders (think wall-mounted hooks or repurposed crates)
- Cooler station or mini beverage cart
- Chalk scoreboard for casual tournaments
- Bluetooth speaker for those pump-up playlists
🧺 Bonus Idea: Keep a “pickleball basket” by the door stocked with balls, sweat towels, and water bottles—convenient and oh-so-cute.
Total Budget Breakdown (Ballpark Estimates):
|
Item |
Estimated Cost |
|
Measuring Tape & Chalk Line |
$15 |
|
Painter’s Tape or Line Kit |
$20–$50 |
|
Portable Net System |
$90–$130 |
|
Surface Prep (DIY gravel or turf mat) |
$50–$200 |
|
Optional Lighting |
$30–$100 |
|
Total |
$200–$500 |
For less than the cost of a fancy paddle or a weekend tournament trip, you can build a backyard sanctuary of spins, slices, and smashes.
Final Rally: Your Court, Your Rules
Building a backyard pickleball court on a budget is about more than saving money—it’s about creating a space that fuels your passion and brings people together. Whether you play solo drills at sunrise or host sunset showdowns with neighbors, your DIY court is a testament to your creativity, commitment, and court-crafty spirit.
So grab that paddle, round up a few friends, and step onto your turf with pride. Because this isn’t just any yard—it’s your home court advantage. 🏓🌿✨




 FREE SHIPPING ON ORDERS $25 OR MORE!
